Функциональность "Черновики" для устройств/en: различия между версиями
Новая страница: «== Description of the Situation == SmartPlayer platform users have access to a convenient way to register a large number of devices. This solution helps reduce the time spent on adding devices to the personal account. The "Drafts" functionality assists users in implementing this capability. == Steps to Follow == {{Note|Users must first request a special distribution package with the specified company ID from the SmartPlayer technical support team.|warn}} T...» |
Нет описания правки |
||
| (не показаны 2 промежуточные версии этого же участника) | |||
| Строка 7: | Строка 7: | ||
After opening this category, the user will see a list of devices available for registration. [[File:Устройства_в_черновиках.png|thumb|center| Example of devices available for registration |800px]] | After opening this category, the user will see a list of devices available for registration. [[File:Устройства_в_черновиках.png|thumb|center| Example of devices available for registration |800px]] | ||
To register a device in the system (move it to the "Devices" section), the user needs to select the desired device or multiple devices and click the "Register" button. [[File:Регистрация_устройства.png|thumb|center| Example of the "Register" button for a device |800px]] | To register a device in the system (move it to the "Devices" section), the user needs to select the desired device or multiple devices and click the "Register" button. [[File:Регистрация_устройства.png|thumb|center| Example of the "Register" button for a device |800px]] | ||
=== Actions with Devices in the "Drafts" Category === | |||
=== | In the "Drafts" category, after selecting a specific device, the user can perform two actions (both in the toolbar on the right, which appears after selecting a device): | ||
# View device information | |||
# | # Register the device | ||
# | [[File:Возможности_устройства.png|thumb|center| Example of available actions for a device in the "Drafts" category |800px]] | ||
[[File:Возможности_устройства.png|thumb|center| | ==== Viewing Device Information ==== | ||
==== | When clicking the information button, the user will be taken to a separate page displaying the device parameters. [[File:Информация_об_устройства.png|thumb|center| Example of the device information page |800px]] | ||
All of this data can be copied by clicking the special icon in the top left corner of the screen. [[File:иконка копировать.png|thumb|center| Example of the copy icon for device information |800px]] | |||
[[File:Информация_об_устройства.png|thumb|center| | ==== Registering a Device ==== | ||
To register a device in the system (move it to the "Devices" section), the user needs to select the desired device or multiple devices and click the "Register" button. [[File:Регистрация_устройства.png|thumb|center| Example of the "Register" button for a device |800px]] | |||
[[File:иконка копировать.png|thumb|center| | After clicking the button, a window will appear where the user needs to: | ||
==== | * Select the license type | ||
* Specify the folder to move the device to [[File:Пример_списка_лицензий.png|thumb|center| Example of parameters for setting up device registration |800px]] [[File:Выбор_папки.png|thumb|center| Example of folder selection parameters for setting up device registration |800px]] | |||
[[File:Регистрация_устройства.png|thumb|center| | After registration, the device can be found in the "Devices" section in the previously selected folder. [[File:Устройства_в_папке.png|thumb|center| Example of devices in a folder |800px]] | ||
=== Registering All Available Devices === | |||
* | The user can register all available devices at once. To do this, use the selection functionality in the navigation menu to select all devices. [[File:Выбор_всех_.png|thumb|center| Example of the "Select All" function in the navigation panel |800px]] | ||
* | The selected devices will then appear in the toolbar on the right. By clicking the "Register" button in the toolbar, the user can add all devices at once. | ||
[[File:Пример_списка_лицензий.png|thumb|center| | [[File:Регистрация_всех_устройств.png|thumb|center| Example of the process of registering all available devices in "Drafts" |800px]] | ||
[[File:Выбор_папки.png|thumb|center| | === Advantages of the "Drafts" Functionality === | ||
In addition to the main function (quickly adding devices), this functionality also offers other convenient features: | |||
[[File:Устройства_в_папке.png|thumb|center| | #If a device was accidentally deleted or deregistered in the system, it will be returned to the drafts. | ||
=== | # In the drafts, all data received from the device is displayed, specifically: | ||
* MAC address | |||
[[File:Выбор_всех_.png|thumb|center| | * IP address | ||
* Serial number | |||
[[File:Регистрация_всех_устройств.png|thumb|center| | Other fields are also displayed, allowing for device identification. | ||
=== | == Video Tutorial == | ||
[https://www.youtube.com/watch?v=Een5iHvZBt8 Adding Devices via "Drafts"] | |||
# | |||
# | |||
* | |||
* | |||
* | |||
== | |||
[https://www.youtube.com/watch?v=Een5iHvZBt8 | |||
== Additional Information == | |||
== | If this article does not help you use the functionality as intended, or if you have any questions after reading it, you can ask them in the "Discussion" section at the top of the page. [[File:Обсуждение_черновики.png|thumb|center| Example of the "Discussion" tab on the wiki page |800px]] | ||
Additional information can also be found on the page [[Как взаимодействовать пользователю с разделом "Обсуждения"]] | |||
[[File:Обсуждение_черновики.png|thumb|center| | |||
Текущая версия от 13:03, 5 сентября 2024
Description of the Situation
SmartPlayer platform users have access to a convenient way to register a large number of devices. This solution helps reduce the time spent on adding devices to the personal account. The "Drafts" functionality assists users in implementing this capability.
Steps to Follow
To use the "Drafts" functionality, the user must first log into their personal account. The next step is to go to the "Devices" section and find the "Drafts" category.

After opening this category, the user will see a list of devices available for registration.

To register a device in the system (move it to the "Devices" section), the user needs to select the desired device or multiple devices and click the "Register" button.

Actions with Devices in the "Drafts" Category
In the "Drafts" category, after selecting a specific device, the user can perform two actions (both in the toolbar on the right, which appears after selecting a device):
- View device information
- Register the device

Viewing Device Information
When clicking the information button, the user will be taken to a separate page displaying the device parameters.

All of this data can be copied by clicking the special icon in the top left corner of the screen.

Registering a Device
To register a device in the system (move it to the "Devices" section), the user needs to select the desired device or multiple devices and click the "Register" button.
After clicking the button, a window will appear where the user needs to:
- Select the license type
- Specify the folder to move the device to
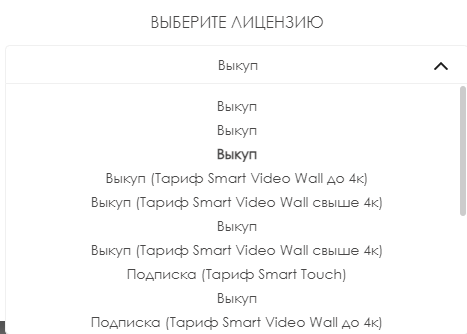
Example of parameters for setting up device registration 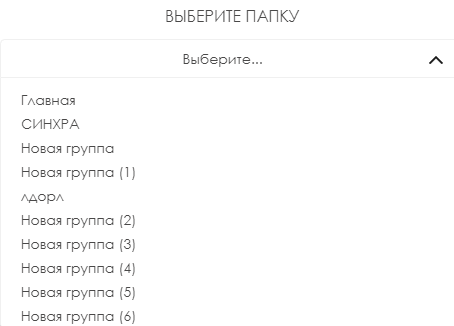
Example of folder selection parameters for setting up device registration


After registration, the device can be found in the "Devices" section in the previously selected folder.

Registering All Available Devices
The user can register all available devices at once. To do this, use the selection functionality in the navigation menu to select all devices.

The selected devices will then appear in the toolbar on the right. By clicking the "Register" button in the toolbar, the user can add all devices at once.

Advantages of the "Drafts" Functionality
In addition to the main function (quickly adding devices), this functionality also offers other convenient features:
- If a device was accidentally deleted or deregistered in the system, it will be returned to the drafts.
- In the drafts, all data received from the device is displayed, specifically:
- MAC address
- IP address
- Serial number
Other fields are also displayed, allowing for device identification.
Video Tutorial
Additional Information
If this article does not help you use the functionality as intended, or if you have any questions after reading it, you can ask them in the "Discussion" section at the top of the page.

Additional information can also be found on the page Как взаимодействовать пользователю с разделом "Обсуждения"
